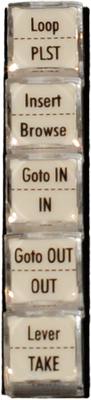
LOOP
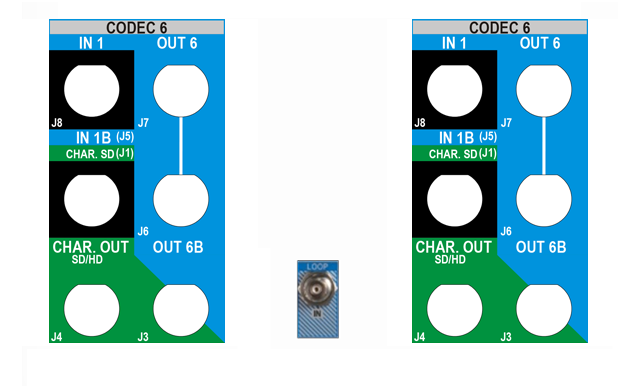
- This function enables the internal loop mode. The button will flash red in this mode and "LOOP" will appear on the OSD of the output monitors. When the user selects the loop mode, the loop has to be cabled from HD/SD "clean" output of PGM1 to the Loop in connector.
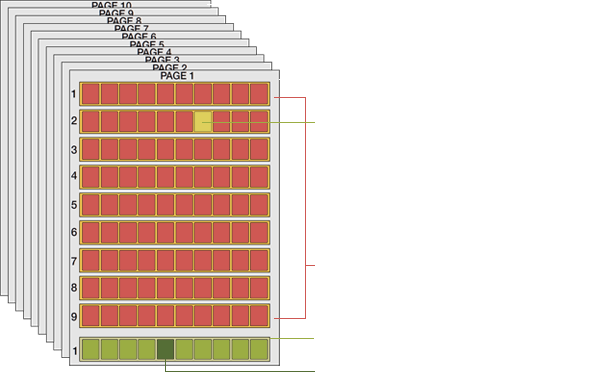
Click here for screenshot of connectors on XT2 - The loop is performed on the audio and video components of the PGM1 output, or on the video only, depending on the Internal Loop Mode parameter of the Setup menu.
- To leave the loop mode, you need to press [SHIFT] + [LOOP] again
PLST
- This function is not active if the current playlist is empty.
If the current playlist is not empty:
Pressing [PLST] once enters the Playlist Edit Mode.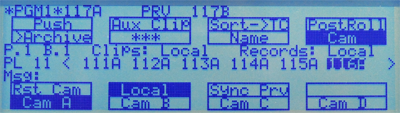
 Pressing [PLST] from the Playlist Edit Mode enters the Playlist Playout Mode
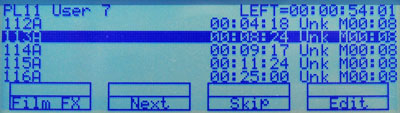 Pressing [PLST] from the Playlist Playout Mode re-cues the playlist to its beginning.
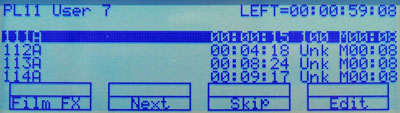
- Pressing [PLST] 3 times will always cue up the playlist ready to roll.
- To play back a playlist that has been cued,press the [PLAY] button and it will roll at the preset speeds.
INSERT
- This function inserts a clip before or after (depending on the respective parameter of the Setup menu) the current position inside the playlist.
BROWSE
- The Browse key can be used in two different modes according to the setting of the related parameter (Browse Button parameter) of the Setup menu (page 3.3).


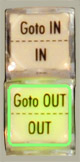
GOTO IN
- When you are in CLIP mode, the key combination [SHIFT] + [GOTO IN] enables the operator to go instantly to the IN points of the loaded clip.
IN
- This function defines the IN point of a clip. Browse to the picture you want to define as the IN point for the clip and press the IN key. The key will light differently depending on the following situations:
- Move the bar to view the respective led colours for the IN and OUT buttons

- To modify the IN/OUT points of a clip, just select the clip and use the jog dial to position the material at the new IN or OUT point, and re-mark the IN or OUT point(s) as required.
GOTO OUT
- When you are in CLIP mode, the key combination [SHIFT] + [GOTO OUT] enables the operator to go instantly to the OUT point of the loaded clip.
OUT
- This function defines the OUT point of a clip. this operates similarly to the IN button.
- Note: The OUT point (field) is always excluded. When playing a clip, it will freeze on the field preceding the OUT point marked by the operator.
- Move the bar to view the respective led colours for the IN and OUT buttons
LEVER
- This key changes the Lever range to the secondary mode. Different ranges are available for this mode.
From: -100% to +100% , 0% to +200% , -200% to +200% , 0 to +400% , -400% to +400%
The selection of the range is done through the Setup menu (page 6.1) of the Remote Control panel.
TAKE
- In PGM+PRV mode, pressing this button swaps cameras on PGM and PRV monitors.
- In Multi-PGM mode, pressing this button toggles between CAM selection and PGM selection modes
- In 2 PGM mode, when both PGM's are selected on the Remote Panel, pressing this button swaps content loaded on PGM1 with the one loaded on PGM2 and viceversa.
- In Playlist Edit mode, pressing this button inserts the clip loaded on the PRV channel into the current playlist.