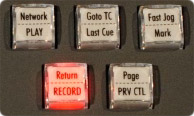
NETWORK
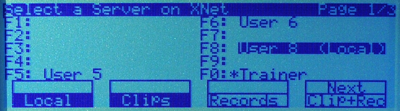
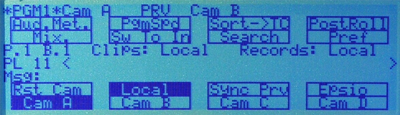
- This function gives access to the clips and/or record trains of other machines on the network. After the selection of the machine, the way of selecting clips and camera angles is similar to clips selection on the local LSM system.
Click here for screenshot of the Network menu
PLAY
- This function initiates a forward motion. It can also be used to start playback of playlists and clips.
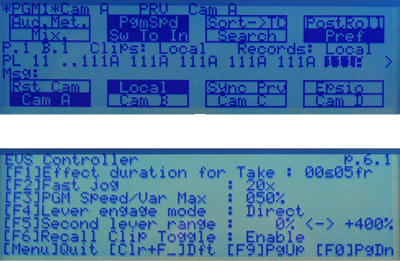
- When Pgm Spd/Var Max is OFF, the default playback speeds when pressing the [PLAY] key are 100% for standard pictures, 33% for Super Motion pictures with a Triple Speed camera (SD), and 50% for Super Motion pictures with a Double Speed camera (HD).
Click here for screenshot - When Pgm Spd/Var Max is ON, the value defined in the Setup for this parameter is used.
Click here for screenshot
GOTO TC
- The Goto TC option allows the user to jump to a given timecode in the loaded train or clip.
How to go to a given timecode in 6 steps :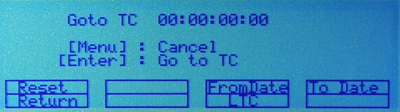
Press [SHIFT] + [GOTO TC] key on the Remote panel to display the GOTO TC window.
To specify a date from which the search should be executed, press [SHIFT] + [C], enter the date in the following format dd/mm/yy using the [F1] to [F10] keys and press [ENTER] on the remote.
To specify a date up to which the search should be executed, press [SHIFT] + [D], enter the date in the following format dd/mm/yy using the [F1] to [F10] keys and press [ENTER] on the remote.
To specify whether to go to a LTC, USER timecode or any of both (LTC & USER), press [C] until the requested timecode type is displayed.
- Enter the requested timecode using the [F1] to [F10] keys. Eight digits: hh:mm:ss:ff are displayed on the LCD screen.
- If you enter all 8 digits, the system will automatically go to the required timecode.
- When you enter less than 8 digits (when the last digits are zeros), press [ENTER] on the Remote to validate the entry and reach the requested timecode.
- If the timecode is from the LTC table, it will be displayed in white on the output monitor.
- If the timecode is from the USER TC table, it will be displayed in yellow on the output monitor.
- If nothing happens after confirming the TC entry with [ENTER], this means that the field corresponding to the selected timecode does not exist on the disk any longer.
- To exit the GOTO TC function at any time, press the [MENU] key
LAST CUE
- This function re-cues the EVS server to the previous cue point relative to the current timecode position. Each time the [LAST CUE] button is pressed, the EVS server re-cues to the previous cue, etc. When recalling a cue point, the cue number appears in the upper left corner of the OSD screen if this option is enabled in the Setup menu.
FAST JOG
- When selected, this option enables fast picture search: the actual speed of this
Fast Jog is adjustable in the Setup menu. The multiplication factor can be defined
from 1 to 20.
- IMPORTANT
The Jog Dial is active at all times when the system is in play & record.
The brake is automatically turned on when starting a playback with the [PLAY] key or with the lever, or when returning to E2E mode with the [RECORD] button.
- IMPORTANT
MARK
- This function marks up to 256 cues that can be marked while recording or playing.
The cues are marked on the LIVE or PLAYBACK program depending on the value set in the Setup menu. - When the operator has marked 256 cues, the next one will overwrite the oldest one.
RETURN
- Inside a clip, press the [RETURN] key to recall the same picture, but inside the record train instead of the clip (If that picture still exists in the record train).This is useful when a clip is too tight and you want to use material beyond the current IN or OUT point.
RECORD
- This key lights red when the system is recording. Pressing this key brings the system in E2E/Live mode, and starts the record if necessary (depending on the settings of the Setup menu). The E2E/Live mode is actually playing pictures already recorded by the system, and has a delay of 3 frames compared to the live source, on all audio and video tracks
PAGE
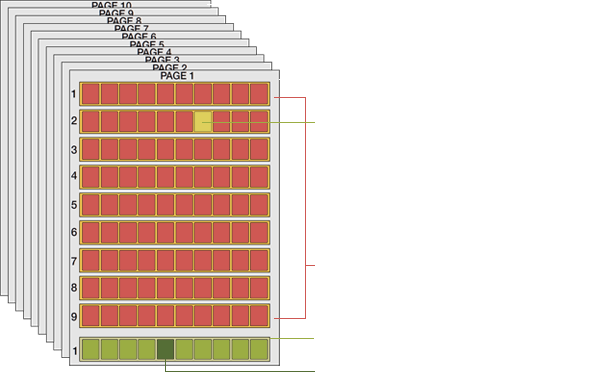
- Use this key to select a new clips page. After pressing the [SHIFT]+[PAGE] key, you must press a F-key to select the corresponding page (1-10)
- Multicam can store up to 900 (multiplied by the number of cameras) clips and 100 playlists in its libraries. This results in a total of 5400 clips on a server.
- If you are working with XNet SDTI Network, keep in mind that the total number of clips
on the entire network is limited to 6 000 or 16 000 depending on the network settings.
Click here for a brief representation of the clip numbering hierarchy
PRV CTL
- Enables/Disables the Preview Control mode.
- Once selecting the PRV CTL mode the operator will have control of the PRV channel with the jog dial and most buttons, while the lever and the [PLAY] button will control the PGM output. At this point, selecting clips will call them up on the PRV side.
- Controlling both PGM and PRV channels is done when the PRV CTL mode is not active.